Contents
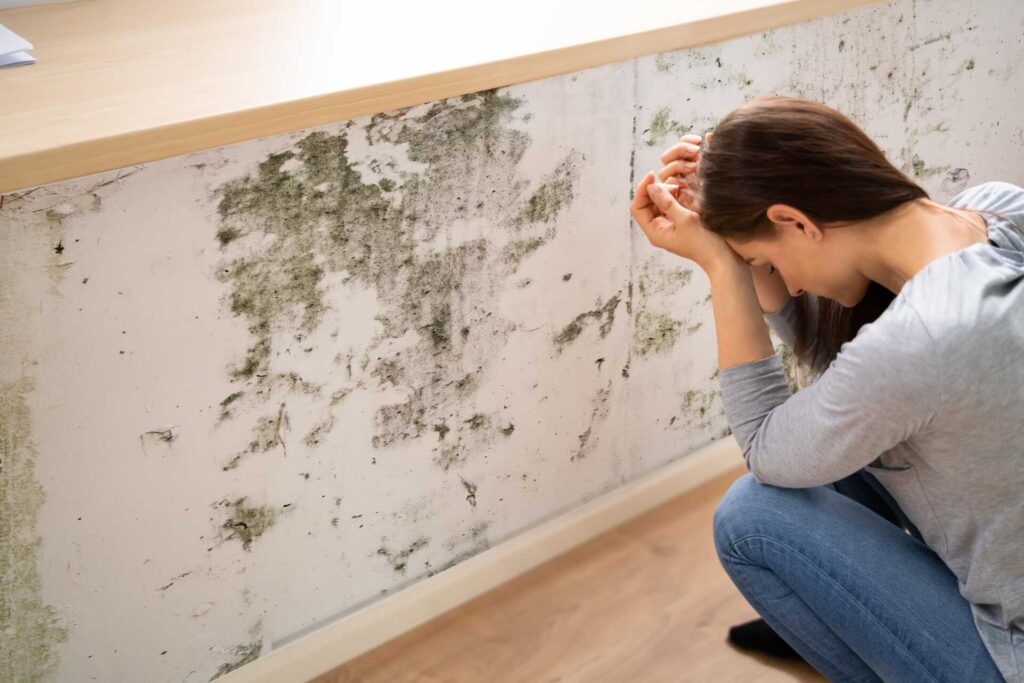
Black mold can thrive in damp areas of your home, often going unnoticed until it becomes a serious problem. Many people underestimate the health risks associated with mold exposure, which can lead to respiratory issues and allergic reactions. To effectively tackle this issue, you need a solid plan and specific techniques. Let’s explore practical tips that can help you combat black mold and keep it from returning.
Key Takeaways
- Conduct a thorough visual inspection in damp areas and check for musty odors to identify black mold presence early.
- Wear protective gear, ensure ventilation, and seal off the area before starting the removal process.
- Create a cleaning solution using equal parts vinegar and water or a tea tree oil mixture for effective mold removal.
- Scrub affected surfaces with the solution, allowing it to sit for 10-15 minutes for maximum effectiveness before rinsing.
- Use dehumidifiers and maintain humidity levels between 30-50% to prevent future mold growth.
Assessing the Extent of Mold Growth
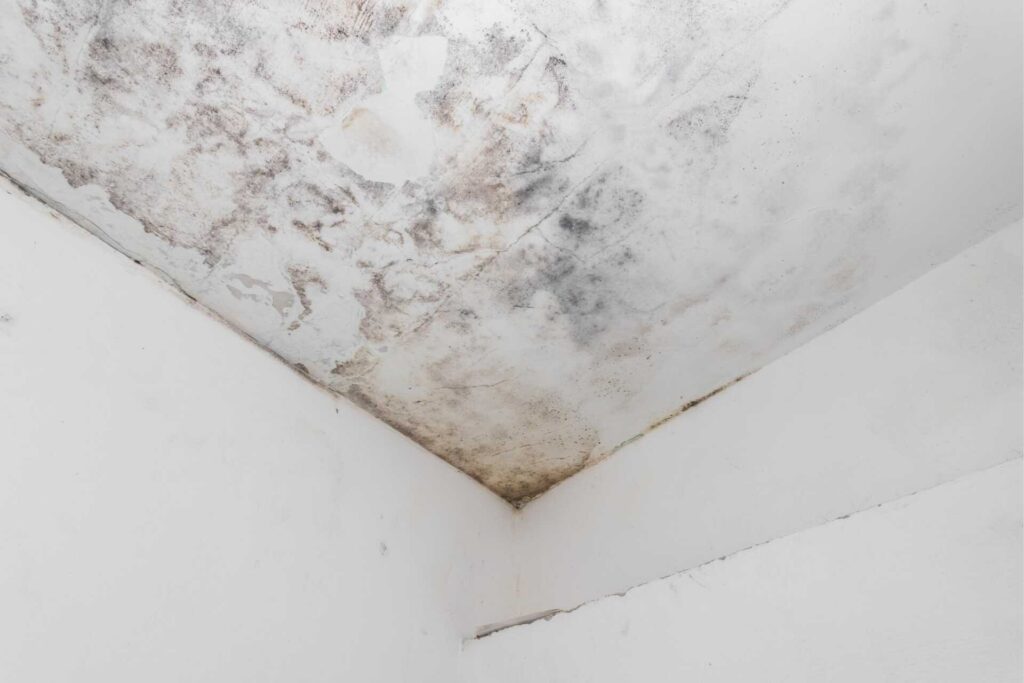
How can you tell just how serious your mold problem is? Start by visually inspecting your home. Look for dark patches, often black or green, typically found in damp areas like bathrooms or basements. Check behind walls, under carpets, and in corners where moisture might accumulate.
Next, assess the smell; if you notice a musty odor, that’s a strong indicator of mold presence.
Don’t forget to evaluate the size of the affected area. Small spots may be manageable, but if you find mold covering more than a square foot, it’s likely a bigger issue.
Also, pay attention to any health symptoms you or your family members experience, like coughing or respiratory irritation, which could signal a more serious problem.
Safety Precautions Before Starting
Before you plunge into mold removal, it’s crucial to prioritize your safety. Start by wearing protective gear, including gloves, goggles, and a mask that’s rated for mold spores. This gear shields you from inhaling harmful particles and prevents skin contact.
Verify the area is well-ventilated; open windows or use fans to keep fresh air flowing. You might even consider sealing off the infected area with plastic sheeting to contain spores from spreading.
Be mindful of your surroundings. If you have underlying health conditions or allergies, consider having someone else handle the removal process. It’s also wise to keep children and pets away from the area until the job’s done.
Always check for any potential hazards, such as electrical wires or structural damage, before you start. Following these precautions not only protects you but also fosters a sense of security for everyone involved.
Gathering Necessary Supplies
Before tackling black mold removal, you need to gather specific supplies to guarantee an effective cleanup.
Essential cleaning products, appropriate safety gear, and the right tools will make the process smoother and safer.
Let’s break down what you’ll need to tackle this challenge head-on.
Essential Cleaning Products
When tackling black mold removal, having the right cleaning products on hand is crucial for effective treatment.
Start with a strong mold-killing solution, like a mix of water and white vinegar or a commercial mold remover. Both options work well to eliminate mold spores.
You’ll also need a scrub brush or sponge for scrubbing surfaces, along with microfiber cloths for wiping down the area afterward.
Don’t forget a spray bottle for easy application of your cleaning solution.
For porous materials like drywall, consider using a specialized mold stain remover.
Finally, keep a bucket handy to dispose of any contaminated materials safely.
Gathering these essential cleaning products guarantees you’re prepared to tackle the mold quickly and efficiently.
Safety Gear Requirements
As you prepare to tackle black mold removal, ensuring your safety should be a top priority. Proper safety gear not only protects you but also instills confidence in the process. Here’s what you need:
| Gear | Purpose | Emotion |
|---|---|---|
| N95 Respirator | Filters airborne spores | Peace of mind |
| Gloves | Protects skin from irritation | Comfort |
| Goggles | Shields eyes from mold particles | Clarity |
Wearing the right gear makes you part of a community dedicated to a mold-free environment. By prioritizing your safety, you’re taking an essential step not just for yourself, but for everyone who shares your space. Stay safe, and you’ll feel empowered to conquer this challenge!
Tools for Removal
Gathering the right tools is essential for effectively removing black mold from your space.
Having the right supplies not only streamlines the process but also helps guarantee your safety and the thoroughness of the job.
Here are three must-have items you should gather:
Protective Gear: Gloves, goggles, and masks to keep you safe from mold spores.
Scrubbing Tools: Stiff brushes and sponges for scrubbing off the mold from surfaces.
Cleaning Solutions: A mix of water and detergent, or a commercial mold remover, to effectively kill mold.
Creating a Cleaning Solution
To effectively tackle black mold, you’ll need to create a powerful cleaning solution using common household ingredients.
Consider mixing vinegar and baking soda for a natural scrub, or try a hydrogen peroxide solution for tougher spots.
If you prefer essential oils, a tea tree oil mixture can provide both cleaning and prevention benefits.
Vinegar and Baking Soda
While many commercial cleaners can be harsh on your health and the environment, a simple solution using vinegar and baking soda can effectively tackle black mold.
This natural duo not only cleans but also helps eliminate odors and prevent regrowth. Here’s how to create your cleaning solution:
Mix equal parts vinegar and water in a spray bottle for an effective mold-killing agent.
Sprinkle baking soda on the affected area after spraying with vinegar to create a scrubbing paste that helps lift mold.
Scrub the area gently with a brush, then rinse with water to clear away any residue.
Using vinegar and baking soda isn’t only easy but also a great way to keep your home healthy and mold-free.
Hydrogen Peroxide Mixture
One effective way to combat black mold is by using a hydrogen peroxide mixture, which not only disinfects but also breaks down mold spores.
To create this solution, mix equal parts of 3% hydrogen peroxide and water in a spray bottle. Shake it gently to combine.
Before you apply it, verify the area is well-ventilated and that you’re wearing gloves and a mask for protection.
Spray the mixture directly on the affected surfaces and let it sit for about 10-15 minutes. This allows the hydrogen peroxide to penetrate and kill the mold.
Finally, wipe the area clean with a cloth or sponge.
Tea Tree Oil Solution
Tea tree oil is a powerful natural remedy for black mold removal, and creating an effective cleaning solution is straightforward.
To harness its benefits, you’ll need just a few ingredients. Mix the following:
- 1 cup of water
- 1 teaspoon of tea tree oil
- A spray bottle for easy application
Combine the water and tea tree oil in the spray bottle, then shake well to blend.
Spray the solution directly onto the moldy area and let it sit for at least an hour. Wipe away the mold with a cloth, and repeat if necessary.
This natural solution not only eliminates black mold but also leaves your space smelling fresh.
You’ll feel good knowing you’re using a safe, eco-friendly method!
Applying the Cleaning Solution
Start by carefully preparing your cleaning solution, as the effectiveness of your mold removal depends on it.
Once your solution is ready, grab a spray bottle or a sponge for application. If you’re using a spray bottle, make sure it’s clean to prevent contamination.
Spray the solution generously over the affected areas, making certain to cover every inch where mold is present. This allows the solution to penetrate and break down the mold effectively.
If you’re using a sponge, dip it into the solution and apply it directly to the moldy surface, making sure you soak the area well. Pay special attention to corners and crevices where mold likes to hide.
Remember, you want the solution to sit for at least 10-15 minutes to maximize its potency. This step is vital in loosening the mold for easier removal later.
Stay diligent; this is the foundation of successful mold cleanup.
Scrubbing and Removing Mold
Once the cleaning solution has had time to work its magic, it’s time to roll up your sleeves and tackle the mold directly.
Grab your scrubbing tools and prepare to get to work. Make sure you wear gloves and a mask to keep yourself safe during the removal process.
Start scrubbing the affected areas using a stiff brush or sponge, applying firm pressure to lift the mold away from the surface.
It’s essential to focus on all visible mold, as well as any surrounding spots that may be discolored.
Here are a few tips to keep in mind:
- Use a circular motion for more effective scrubbing.
- Rinse your brush often to avoid spreading mold spores.
- Thoroughly clean any tools you use afterward to prevent recontamination.
Once you’ve scrubbed the area, you’ll be one step closer to a mold-free home.
Disinfecting Affected Areas
After scrubbing away the visible mold, it’s crucial to disinfect the affected areas to guarantee any remaining spores are eliminated.
Start by mixing a solution of one cup of bleach with one gallon of water. This powerful disinfectant will help kill mold spores that may have been missed during scrubbing.
Wearing gloves and a mask, apply the solution to the surfaces using a sponge or rag, ensuring you cover all areas thoroughly.
For non-porous surfaces, let the solution sit for at least 10 minutes before rinsing. If you’re dealing with porous materials, consider using a commercial mold remover or vinegar, as they can penetrate deeper into the material.
Once you’ve disinfected everything, don’t forget to clean your tools and dispose of any contaminated materials safely.
Properly Drying the Area
To effectively prevent mold from returning, it’s essential to dry the affected area thoroughly and quickly. Mold thrives in moisture, so your goal is to eliminate any lingering dampness.
Begin by removing any soaked materials, like carpets or drywall, and then use fans or dehumidifiers to speed up the drying process. Open windows and doors to promote airflow, if weather permits.
Here are some practical steps to guarantee proper drying:
- Use high-capacity fans: Position them strategically to maximize airflow across wet surfaces.
- Employ a dehumidifier: This can help pull moisture from the air, especially in enclosed spaces.
- Check for hidden moisture: Inspect behind walls or under floors, as mold can hide in unexpected spots.
Preventing Future Mold Growth
To prevent future mold growth, you need to control humidity levels in your home.
Use dehumidifiers in damp areas and guarantee your ventilation systems are working effectively to promote air circulation.
Control Humidity Levels
Controlling humidity levels in your home is essential for preventing future mold growth, especially in areas prone to dampness.
Keeping humidity between 30-50% can greatly reduce the risk of mold. Here are some practical steps you can take:
- Use dehumidifiers: Place them in basements or any damp areas to remove excess moisture.
- Seal leaks: Check for leaks in pipes, roofs, and windows to prevent water accumulation.
- Monitor humidity: Invest in a hygrometer to easily track humidity levels in your home.
These tips help create a healthier living environment and make your home more comfortable.
Improve Ventilation Systems
While humidity control is essential, improving your ventilation systems is equally important in preventing future mold growth. Proper airflow helps reduce moisture buildup, making your home less hospitable to mold. Start by verifying exhaust fans in bathrooms and kitchens are functioning well. You can also open windows regularly to let fresh air circulate.
Here’s a quick reference table to help you enhance your ventilation:
| Tip | Benefits |
|---|---|
| Install Exhaust Fans | Reduces humidity in rooms |
| Open Windows | Increases fresh air flow |
| Use Dehumidifiers | Controls excess moisture |
| Check Ducts | Guarantees unobstructed airflow |
When to Call a Professional
If you notice extensive black mold growth, it’s crucial to call a professional rather than attempting to tackle it yourself.
While DIY methods can be effective for small patches, larger infestations pose serious health risks and require specialized expertise.
Professionals have the training and equipment to handle the situation safely, ensuring your home is mold-free and your family’s health is protected.
Consider calling a professional if:
- The mold covers an area larger than 10 square feet.
- You experience persistent health issues, like respiratory problems or allergic reactions.
- The mold is located in hard-to-reach areas, such as behind walls or ceilings.
To Sum Up
By following these DIY tips, you can battle black mold like a hero facing a formidable foe. Remember, it’s not just about removing the mold; it’s about preventing its return. Keep your home dry, well-ventilated, and regularly check for leaks. If you find yourself overwhelmed, don’t hesitate to call in the professionals—they can be the cavalry that saves the day. With diligence and care, you’ll reclaim your space from the clutches of mold and breathe easy again.