Contents
When faced with fire or water damage, knowing the vital methods for restoration can make all the difference. You need to start with a thorough damage assessment to create an effective restoration plan. From emergency water removal techniques to mold remediation strategies, each step is essential for a successful recovery. Understanding these methods can help you navigate the complexities of restoration and guarantee safety. Let’s explore these strategies in detail.
Key Takeaways
- Quickly remove standing water using pumps and vacuums to prevent further damage and create a safer environment.
- Assess fire and water damage thoroughly to prioritize restoration efforts and engage professionals as needed.
- Implement drying and dehumidification processes, utilizing fans and dehumidifiers to expedite moisture removal.
- Control humidity levels and seal leaks to prevent mold growth during and after restoration.
- Conduct final inspections to ensure compliance with safety standards and building codes post-restoration.
Assessing the Damage and Creating a Restoration Plan
When you face fire or water damage, it’s crucial to assess the situation promptly to create an effective restoration plan. Start by identifying the source of the damage and evaluating its extent. Look for structural issues, compromised electrical systems, and affected materials. Take notes and document everything with photos to support your restoration decisions.
Next, prioritize areas based on severity. Determine what can be salvaged and what needs replacement. Engage professionals when necessary, as their expertise can streamline the recovery process.
Develop a step-by-step restoration plan, outlining immediate actions and long-term strategies. Consider safety first; verify the area is safe for entry before proceeding.
Communicate openly with your team or family about the plan and expected timelines. This transparency fosters a sense of unity and belonging during a stressful time.
Emergency Water Removal Techniques
When you face water damage, swift action is essential.
Start by pumping out standing water to prevent further structural damage, then use dehumidifiers effectively to remove moisture from the air.
Don’t forget to take into account electrical safety throughout the process to avoid hazards.
Pumping Out Standing Water
Pumping out standing water is essential for minimizing damage and preventing mold growth after a flood or leak.
Start by identifying the source of the water and addressing any leaks to prevent further issues. Use a submersible pump for larger areas, as it efficiently removes water quickly. For smaller spots, a wet/dry vacuum can be effective.
Always wear protective gear, like gloves and boots, to safeguard yourself from contaminants. After the bulk of the water is removed, check for hidden pockets where water may remain.
This technique not only reduces damage but also creates a safer environment for you and your family. Remember, the quicker you act, the less severe the damage will be.
Using Dehumidifiers Effectively
After removing standing water, the next step in emergency water removal involves using dehumidifiers effectively.
Start by selecting the appropriate size of dehumidifier based on the area’s dimensions and moisture levels. Place the unit in a central location to maximize airflow. Confirm windows and doors are closed to optimize efficiency.
Turn on the dehumidifier and set it to the desired humidity level, typically around 30-50%. Monitor the water collection tank, emptying it regularly to maintain continuous operation.
For best results, run the dehumidifier alongside fans to enhance air circulation. Keep an eye on humidity levels with a hygrometer, adjusting settings as needed.
This method will considerably expedite the drying process and help prevent mold growth.
Safe Electrical Considerations
As you navigate the emergency water removal process, it is crucial to prioritize safe electrical considerations to avoid hazards. Always make certain that you turn off the main power supply before entering flooded areas. Inspect all electrical equipment for damage, and never use appliances that have been submerged. Here’s a quick reference table for safe practices:
| Action | Recommendation | Notes |
|---|---|---|
| Turn Off Power | Before entering flooded areas | Prevents electrical shock |
| Inspect Equipment | Check for damage | Discard damaged items |
| Use Ground Fault Devices | Employ GFCIs | Added protection |
| Avoid Wet Areas | Stay clear of waterlogged zones | Protects from hazards |
| Call Professionals | When in doubt | Guarantee safe removal |
Drying and Dehumidification Processes
While moisture removal is critical in restoration, understanding the drying and dehumidification processes is essential for effective recovery. You need to implement these strategies to guarantee your property returns to its pre-loss condition:
Air Movement: Use fans and blowers to circulate air, facilitating evaporation. This step increases the rate at which moisture leaves surfaces.
Dehumidification: Deploy dehumidifiers to extract moisture from the air. This reduces humidity levels and accelerates drying, preventing further damage.
Temperature Control: Maintain a warm environment, as higher temperatures promote faster evaporation. Adjusting the thermostat can greatly enhance the drying process.
Mold Remediation Strategies
To effectively combat mold growth, you need to implement prevention techniques alongside safe removal practices.
Start by controlling humidity levels and ensuring proper ventilation in your space.
When removal is necessary, always follow guidelines to protect both yourself and your environment.
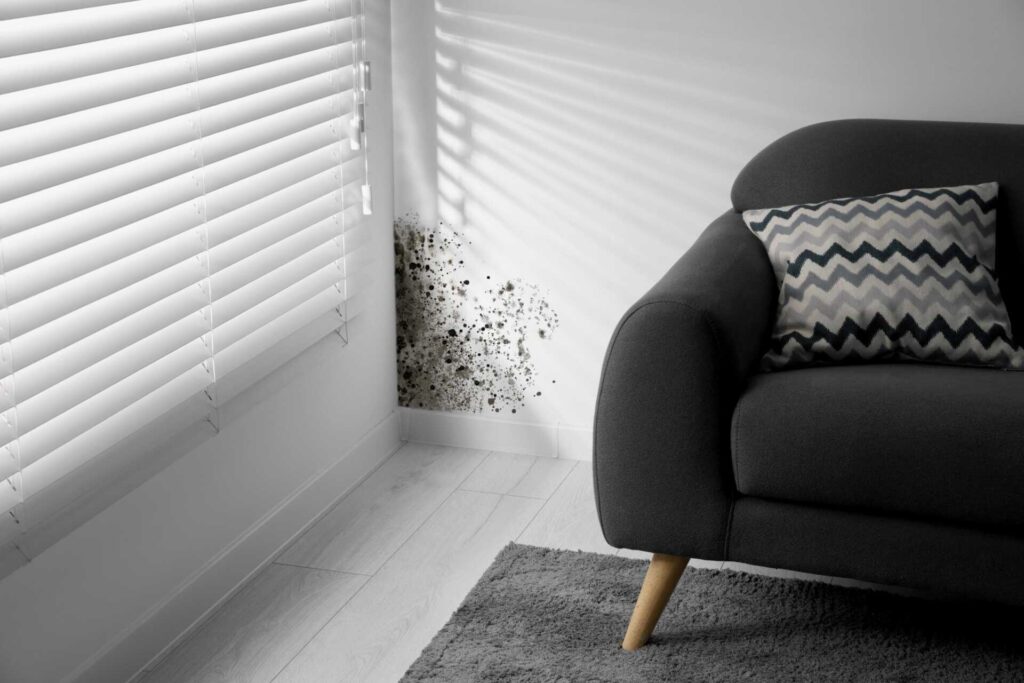
Mold Prevention Techniques
Effective mold prevention techniques are essential for maintaining a healthy indoor environment, especially in areas prone to moisture.
To minimize the risk of mold growth, you should implement these strategies:
Control Humidity: Keep indoor humidity levels below 50% by using dehumidifiers and ensuring proper ventilation.
Seal Leaks: Regularly inspect your property for plumbing leaks and seal any gaps around windows and doors to prevent water infiltration.
Proper Insulation: Insulate walls, attics, and basements to reduce condensation and temperature fluctuations that can lead to moisture buildup.
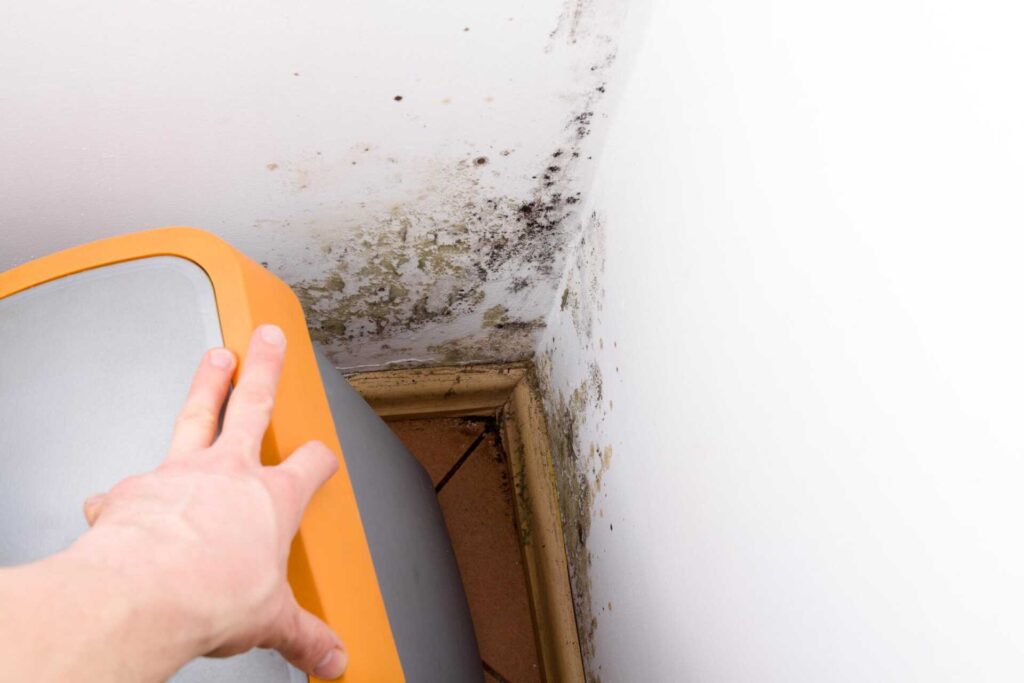
Safe Removal Practices
Even with thorough mold prevention techniques in place, situations may arise that necessitate mold remediation. When you encounter mold, it’s essential to act swiftly and safely.
Start by wearing protective gear, including gloves, goggles, and an N95 respirator. Isolate the contaminated area by closing doors and windows to prevent spores from spreading. Use plastic sheeting to seal off the space effectively.
Next, remove affected materials like drywall or carpeting with care, placing them in sealed plastic bags. Clean non-porous surfaces with a mixture of water and detergent, followed by a solution of water and bleach. Guarantee proper ventilation during the process.
Finally, dispose of all contaminated materials responsibly, and check for moisture sources to prevent future growth.
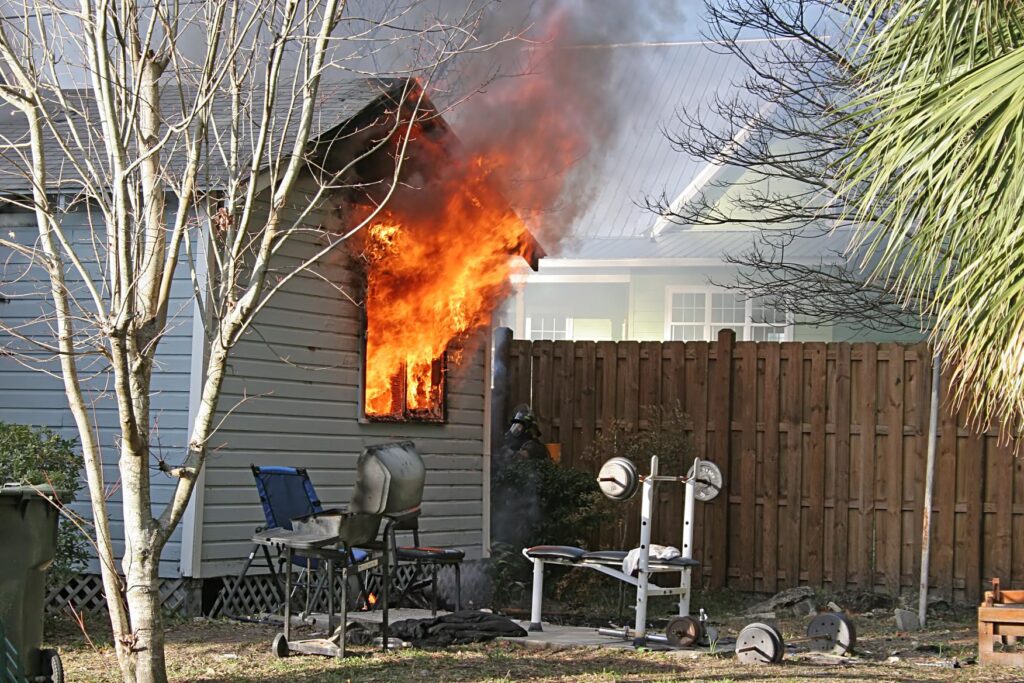
Fire Damage Cleanup Procedures
When a fire strikes, prompt and thorough cleanup is crucial to minimize damage and restore safety. Follow these key procedures to effectively manage fire damage cleanup:
Assess the Damage: Begin by evaluating the extent of the damage. Identify areas affected by flames, smoke, and soot to prioritize your efforts.
Remove Debris: Clear out charred materials, burnt furniture, and other debris. Use protective gear to guarantee your safety while handling hazardous items.
Clean and Deodorize: Use specialized equipment and cleaning agents to remove soot and smoke odors from walls, ceilings, and surfaces.
This step helps prevent permanent damage and improves indoor air quality.
Structural Repairs and Restoration
After evaluating the fire damage, you’ll need to focus on structural repairs and restoration to guarantee the safety and integrity of the building.
Start by determining the extent of damage to load-bearing walls, beams, and the foundation. If you find any structural compromises, consult a structural engineer for guidance.
Next, remove any charred or weakened materials. Replace damaged framing, drywall, and insulation with fire-resistant materials to enhance safety.
Verify all electrical and plumbing systems are inspected and repaired by licensed professionals to avoid future hazards.
Once you’ve addressed the structural concerns, reinforce the building with fire-retardant coatings and materials. This not only secures the structure but also helps in compliance with local safety codes.
Finally, document all repairs for insurance purposes and future reference. Keeping thorough records strengthens your position should any disputes arise.
Final Inspection and Prevention Measures
Before you wrap up the restoration process, conducting a thorough final inspection is essential to confirm that all repairs meet safety standards and building codes. This step guarantees not only compliance but also the safety and comfort of everyone in the space.
Here are three significant aspects to focus on during your inspection:
Structural Integrity: Check load-bearing walls, beams, and foundations for any signs of weakness or damage.
Electrical Systems: Verify that all wiring and outlets are functioning correctly and up to code to prevent fire hazards.
Water Damage Prevention: Inspect for leaks, mold, and proper drainage systems to avoid future water-related issues.
Finally, implement preventive measures such as regular maintenance checks and installing smoke detectors and water alarms.
Wrap-Up
In the world of fire and water damage restoration, time is of the essence. By following these essential methods, you can tackle the aftermath head-on and prevent further complications. Remember, it’s vital to act swiftly and efficiently—don’t let the situation get out of hand. With a solid restoration plan and diligent execution, you can restore your property to its former glory while ensuring safety and compliance with building codes. Stay proactive to avoid future issues.