Contents
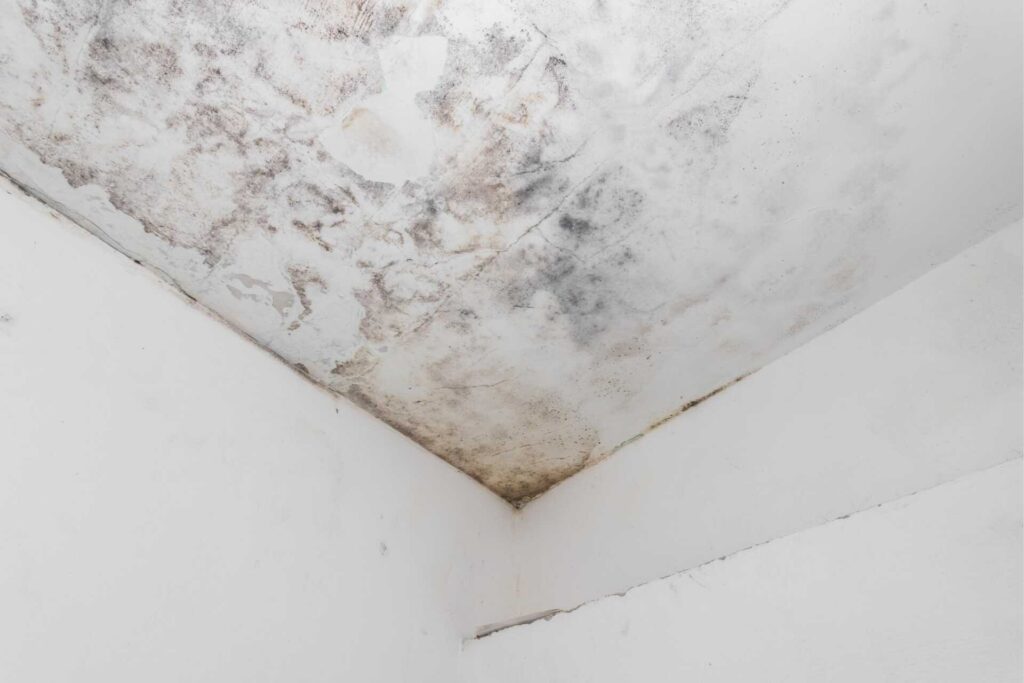
Imagine discovering mold creeping along your bathroom walls after a leak. It’s a common scenario that highlights the importance of genuine mold remediation strategies following water damage. You need to act swiftly and systematically to address the issue effectively. Understanding how to assess the damage, remove excess water, and implement proper cleaning techniques can make all the difference. So, what steps should you take to ensure your home is mold-free for the long haul?
Key Takeaways
- Quickly identify and eliminate the source of water intrusion to prevent further mold growth.
- Extract standing water using pumps and vacuums, then initiate immediate drying with fans and dehumidifiers.
- Seal off affected areas with plastic sheeting to contain mold spores and create a negative air pressure environment.
- Clean and sanitize all surfaces using mold-specific, non-toxic cleaners, ensuring thorough rinsing and disposal of contaminated materials.
- Maintain low indoor humidity levels below 60% and educate occupants on mold awareness to prevent future occurrences.
Assessing the Extent of Water Damage
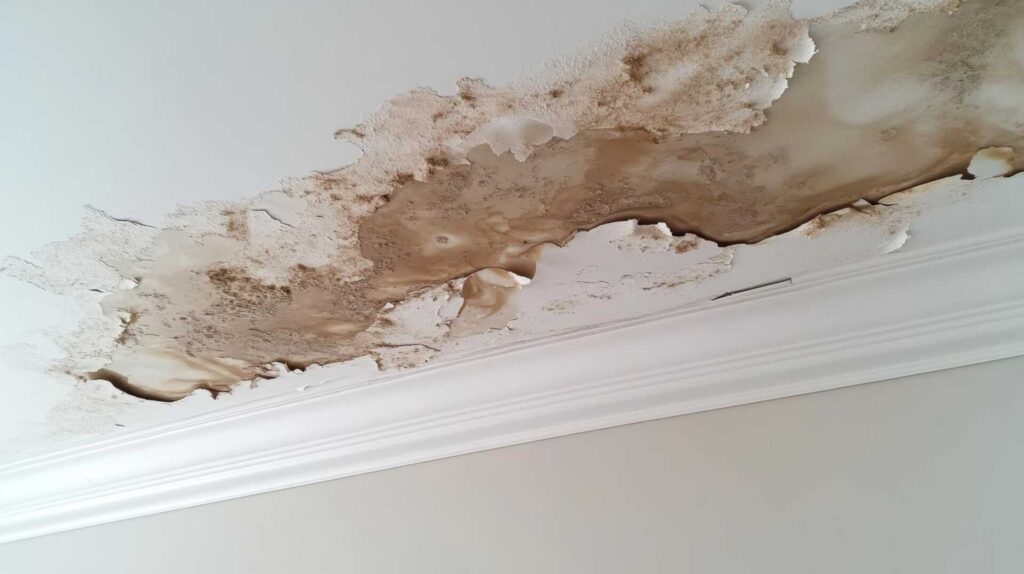
How can you effectively assess the extent of water damage in your home? Start by inspecting visible areas and checking for discoloration, peeling paint, or warped surfaces.
Pay attention to corners and behind furniture, as these spots often hide issues. Next, probe materials like drywall and wood; if they feel soft or crumble, they’re likely compromised.
Use a moisture meter to get accurate readings, especially in hidden spaces like basements or attics. Don’t forget about your flooring—carpets can trap water beneath, leading to mold growth.
After your initial assessment, document everything with photos and notes, as this will help you communicate with professionals later.
If you suspect structural damage, it’s wise to seek expert advice. Remember, timely and thorough assessment protects your home and keeps your family safe.
Implementing Immediate Water Removal Techniques
When you face water damage, evaluating the extent of the issue is your first step.
Once you’ve examined the situation, utilizing effective extraction equipment becomes vital for immediate water removal.
This quick action minimizes further damage and helps prevent mold growth.
Assessing Water Damage
As you assess water damage in your property, it’s crucial to act quickly to minimize the impact and prevent mold growth.
Start by identifying the source of the water intrusion, whether it’s a burst pipe, roof leak, or flooding. Next, inspect affected areas, including walls, floors, and ceilings, to determine the extent of the damage.
Look for discoloration, warping, or dampness. Don’t forget to check hidden spaces like behind appliances and under carpets, as moisture can linger there.
Document your findings with photos for insurance purposes.
Prioritize safety by wearing protective gear, as contaminated water may pose health risks.
This thorough assessment lays the groundwork for effective remediation and helps you make informed decisions moving forward.
Utilizing Extraction Equipment
Effective water removal is essential to preventing mold growth after a water intrusion event. Utilizing extraction equipment, like submersible pumps and wet/dry vacuums, allows you to remove standing water rapidly and efficiently.
Start by evaluating the water level; then, deploy the appropriate equipment to extract as much water as possible. It’s vital to work methodically, focusing on areas with the most saturation. Keep in mind that the faster you act, the less chance mold has to establish itself.
Additionally, using dehumidifiers alongside extraction equipment can help lower humidity levels, further reducing the risk. Remember, thorough water removal is your first line of defense in maintaining a safe, healthy environment for everyone involved.
Containing and Isolating Affected Areas
To successfully contain and isolate affected areas, you must first identify the extent of the mold infestation. Start by inspecting the premises and paying close attention to moisture-prone zones like basements and bathrooms.
Once you’ve pinpointed the affected regions, use plastic sheeting to seal off these areas. This minimizes the risk of spores spreading to unaffected spaces. Make certain to create a negative air pressure environment by using exhaust fans, which help draw airborne spores away from clean areas.
Next, consider employing airlocks at entry points. These act as buffers, keeping mold spores contained. Confirm you wear proper personal protective equipment (PPE) during this process, as it safeguards your health.
Finally, limit foot traffic in and out of the contaminated zones to further reduce the risk of cross-contamination. By following these steps, you’ll effectively contain and isolate mold-affected areas, laying the groundwork for successful remediation.
Cleaning and Sanitizing Surfaces
Once you’ve contained and isolated the affected areas, the next essential step is cleaning and sanitizing surfaces to eliminate any residual mold spores.
Begin by using a mixture of water and a non-toxic cleaner specifically designed for mold removal. Scrub surfaces thoroughly, paying close attention to corners, crevices, and any porous materials. After cleaning, rinse the surfaces with clean water to remove any remaining cleaners and spores.
Next, apply a sanitizing solution, ensuring it’s approved for mold remediation. This step helps to kill any lingering spores that could lead to future growth. Be sure to follow the manufacturer’s instructions for application and contact time.
Finally, dispose of any cleaning materials like sponges or rags used during the process to prevent recontamination.
Drying and Dehumidification Processes
When addressing mold issues, rapid drying is vital to prevent further growth.
Choosing the right dehumidifier can greatly impact your remediation efforts, so it’s important to understand your options.
Additionally, actively monitoring humidity levels ensures that your environment stays inhospitable to mold.
Importance of Rapid Drying
Rapid drying is essential in mold remediation, as it greatly reduces the likelihood of mold growth following water damage.
When water saturates materials like drywall or wood, it creates an ideal environment for mold spores to thrive. By initiating a rapid drying process, you eliminate excess moisture quickly, minimizing the chances for mold to establish.
You’ll want to focus on both air movement and temperature control, as these factors play an important role in effective drying. Utilizing fans and heaters can expedite this process.
Remember, time is of the essence; the longer materials remain damp, the higher the risk for mold proliferation.
Dehumidifier Selection Tips
After ensuring rapid drying of affected areas, selecting the right dehumidifier becomes an essential next step in the mold remediation process.
First, consider the size of the space; a dehumidifier’s capacity should match the area’s square footage. Look for units with a high pint extraction rate for effective moisture removal.
It’s also wise to choose models with adjustable settings, allowing you to tailor humidity levels based on specific needs.
Energy efficiency is another key factor; opting for ENERGY STAR-rated units can save you money in the long run.
Finally, consider features like built-in pumps or continuous drainage options for hassle-free operation.
Choosing the right dehumidifier helps create a healthier environment, reducing the risk of mold growth and fostering a sense of safety in your home.
Monitoring Humidity Levels
How can you effectively monitor humidity levels during the drying and dehumidification processes? First, invest in a reliable hygrometer to measure relative humidity in your space. Aim for levels below 60% to prevent mold growth.
Regularly check and record these readings, ideally multiple times a day, to track progress. Additionally, use a dehumidifier that’s appropriately sized for the area; this ensures efficient moisture removal.
Keep windows and doors closed to avoid introducing outside humidity. If possible, employ a digital monitoring system that alerts you when humidity levels rise unexpectedly.
Preventing Future Mold Growth
Although mold can thrive in a variety of environments, you can considerably reduce the risk of future growth by implementing proactive measures. Start by ensuring proper ventilation in your home, especially in areas like bathrooms and kitchens. Regularly inspect your plumbing for leaks and fix them promptly.
Here’s a quick reference table to help you remember key strategies:
| Strategy | Action | Frequency |
|---|---|---|
| Ventilation | Use exhaust fans | Daily |
| Moisture Control | Dehumidify spaces | As needed |
| Inspection | Check for leaks | Monthly |
| Cleaning | Remove mold spores | As necessary |
Conclusion
In the aftermath of water damage, you must act decisively to thwart mold’s relentless advance, much like Odysseus steering through the treacherous waters of the Aegean. By evaluating damage, removing standing water, and isolating affected areas, you lay the groundwork for effective remediation. Cleaning surfaces and maintaining low humidity levels are your shields against future growth. Remember, the battle against mold is about immediate fixes and safeguarding your home for the long haul.